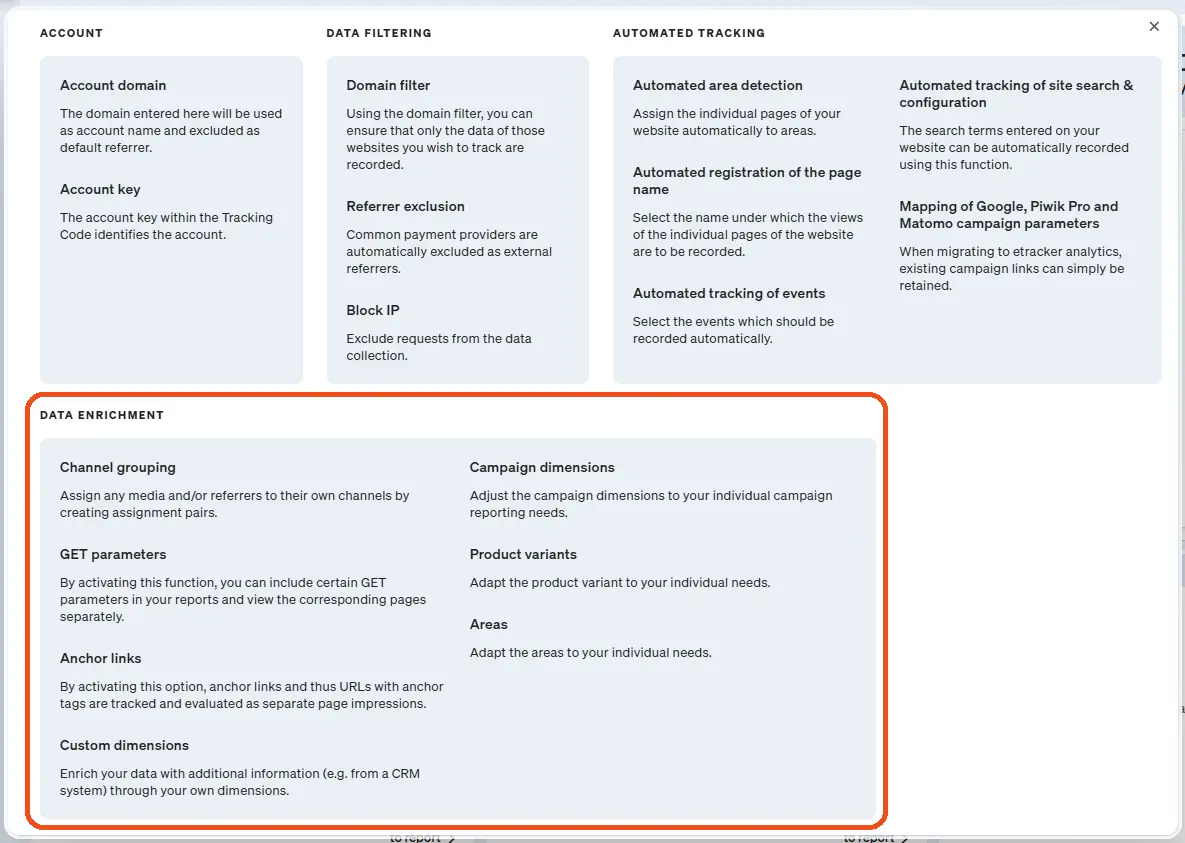
Data enrichment
Use the various options to record additional information with etracker analytics, group it individually or customize the names of dimensions. The corresponding settings can be accessed via the Account menu item:
Channel grouping
Two dimensions are available in etracker analytics to group sources of origin: Medium and Channels.
The Medium dimension is assigned using the standard origin grouping and the associated campaign link parameter. The following standard assignments are set up:
| Medium | Description |
|---|---|
| Type-In | Direct access without referrer or campaign parameters, where visitors access the website by entering the URL or via a saved link. |
| SEO | Website visits via organic search from Google, Safari, Bing, Firefox, Edge, etc. If the links of search engine ads are not provided with UTM or etracker campaign parameters, ad links are also listed under SEO. |
| SEA | The assignment of links from the “paid search” requires that the ads are provided with campaign parameters. For Google Ads, the “Suffix of the final URL” field should be used for this. In Microsoft Ads, the field is called “Suffix of the final URL”. |
| Social Media | Traffic via links from social networks. If ads are placed on Facebook, Instagram, TikTok, etc., “Social Ads” can be used as a medium, for example, to differentiate between organic and paid traffic from social networks at medium level. |
| Link/Referrer | Links from other websites, i.e. external links to your own website. It is important that all internal domains are entered under Account → Domain filter → Referrer exclusion. |
| AI | Link calls from AI models, i.e. LLMs such as ChatGPT, Perplexity, Gemini, Deepseek, Copilot and Grok. |
To create your own user-defined grouping, especially for organic sources of origin, automatic assignment rules can be set up using the Channel grouping function. This does not change the standard grouping under Medium, but supplements it with entries in the Channels dimension. Both dimensions can be used in reports and even combined with each other.
Proceed as follows:
- Open Account → Data enrichment → Channel grouping.
- Enter a name for the channel to be created.
- Assign a medium, a referrer or a campaign to the channel by selecting the desired entry from the list that opens.
- The Add button can be used to create additional assignment pairs for existing or new channels. When assigning several media or referrers to a user-defined channel, please ensure that the channel name is written in the same way.
- Then click on Save changes to save the assignment pairs and activate them at the same time.
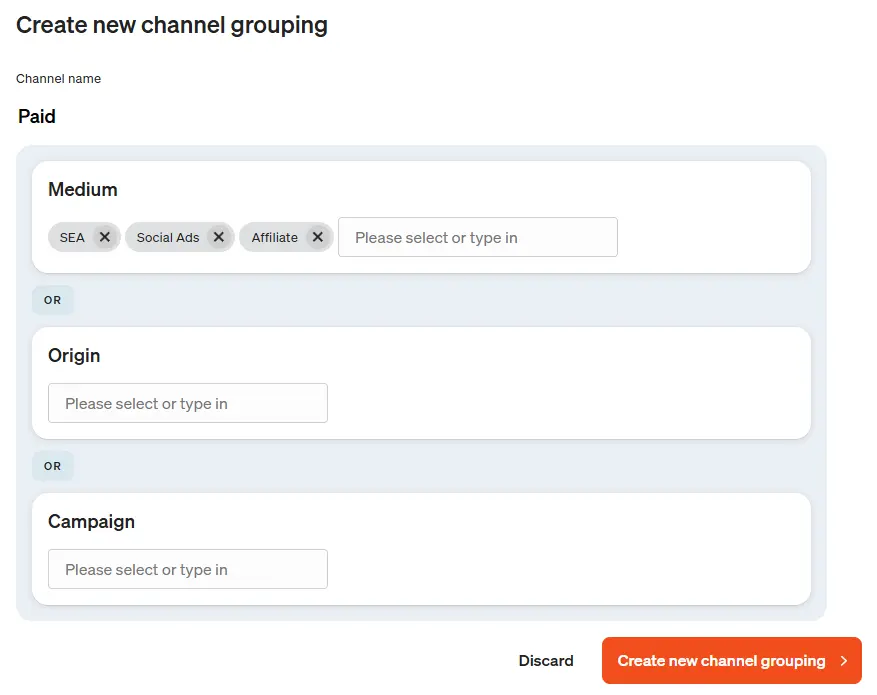
From the time a channel grouping has been configured, the accesses of users who reach the website via a medium or referrer set up in the assignment pairs are automatically assigned to the respective channel based on rules. To evaluate this, open the Medium report, for example, click on Select dimension, activate the Channels dimension and click on Done.
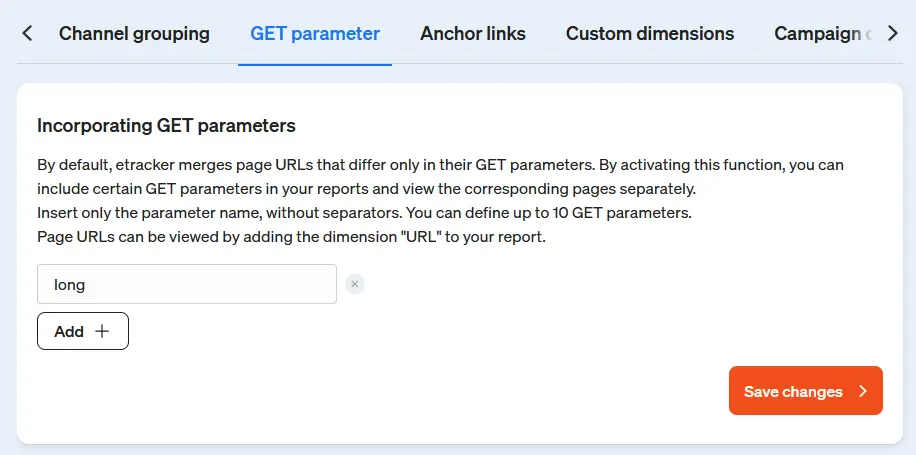
GET parameters
By default, URL parameters are not taken into account when differentiating between individual websites. If this is required, the corresponding parameters must be entered and saved under Automatic capture → Page names must be selected. In addition, information from GET parameters can be included as an area dimension, such as possible language variants. The corresponding parameters must be specified once and entered under Automatic capture → Ranges be assigned.
Anchor links
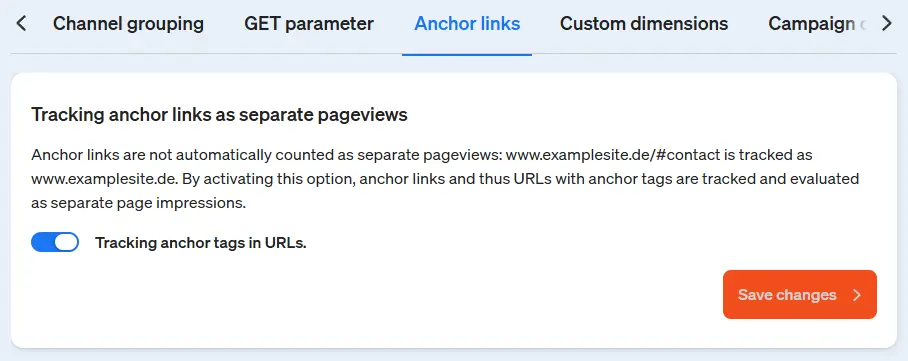
By default, internal or external anchor links (jump labels) are measured automatically. Page views that are generated, for example, via an anchor link https://meineseite.de/#abschnitt3 take the visitor directly to the third section can be found as separate page views in the reports.
If differentiated measurement is not desired, this can be deactivated using the slider and then saving.
Own dimensions
Using your custom dimensions, data on pages (page impressions), visitors (users) and visits (sessions) can be enriched with additional information (e.g. from your own data sources such as a CRM system). These are transferred to etracker with the help of parameters and allow an in-depth view in the analysis.
The option to create your own dimensions and an overview of the dimensions you have already created can be found under Account → Data enrichment → Custom dimensions.
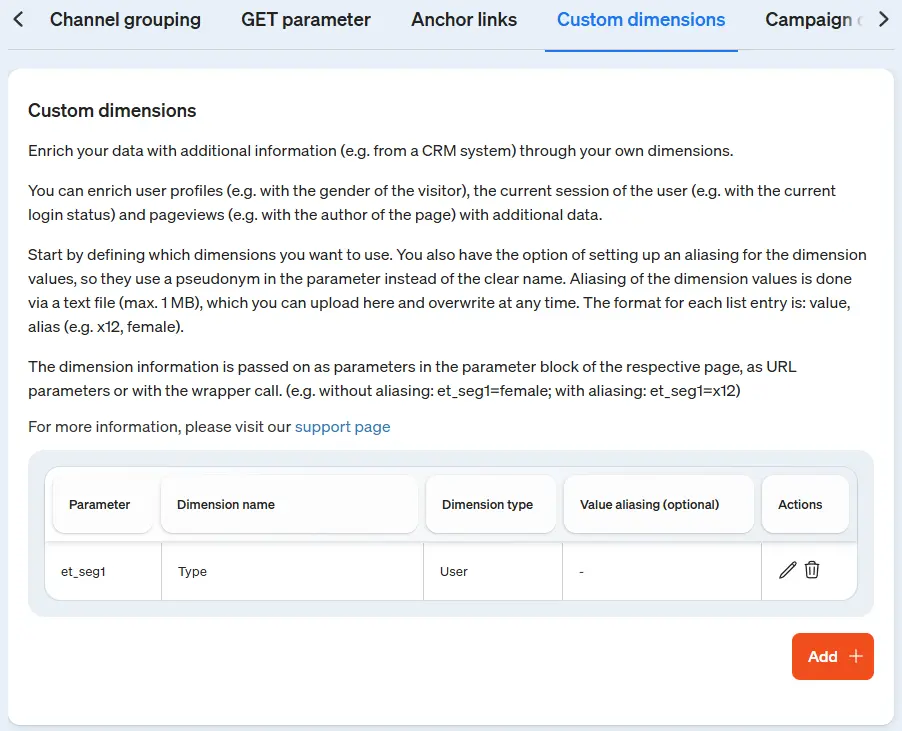
To create a new custom dimension, click on Add+ and enter the name that is to be displayed later in the reports in the Dimension name field. Then select one of the following options from the drop-down menu for the dimension type:
- User: Add this dimension type to enrich user profiles.
- Page Impression: Add this dimension type to enrich pages.
- Session: Add this dimension type to enrich visits.

Examples for the enrichment of user profiles, page impressions and sessions:
User (visitor)
- Sociodemographics
- Customer segment (CRM)
- Gender
Page impression (page)
- Testing variant
- Personalization
- Template/page type
- Author
- Updating/creation
- Language
- With/without video
- Product evaluation
- Keywords
- Rating
Session (visit)
- Login status
After adding your own dimension, it appears in the dimension overview. The parameter (e.g. “et_seg1“) with which the dimension information can be transferred is displayed in the Parameter column. Five custom dimensions can be defined by default. If you require additional custom dimensions, please contact Customer Service.
Value aliasing (optional)
Aliasing can be set up for the transferred dimension values so that a pseudonym can be transferred in the parameter instead of the clear name. The dimension values are aliased via a csv file (max. 1 MB), which is uploaded to the corresponding custom dimension and can be overwritten at any time.
The format for each list entry is: value, alias (e.g. x12, female or “x12”, “female”).
Click on +-.csv file to select and upload the values file.
Aliasing only applies from the time the file is saved in the application for all future visits by the respective website visitor, but not retroactively.
If values that are not in the aliasing file are transferred to etracker, they are listed in the reports without an alias.

Existing custom dimensions can be edited by clicking on the pencil icon in the Actions column. You can rename your own dimension and optionally add a csv file for value aliasing or replace an existing value file.
Please note that adding, replacing or removing a value file only affects data recorded in the future and not data from previous periods.
Dimension types of an existing dimension cannot be changed retrospectively.
To delete a custom dimension, click on the trash can icon in the dimension overview. Your own dimension is then no longer available for selection in the reports.
Once a custom dimension has been deleted, it is no longer available for past periods and the data for this custom dimension can no longer be retrieved.
If own dimensions under Account → Data enrichment → Custom dimensions the dimension information can be transferred as a parameter in the parameter block of the tracking code, as a URL parameter or with a wrapper call.
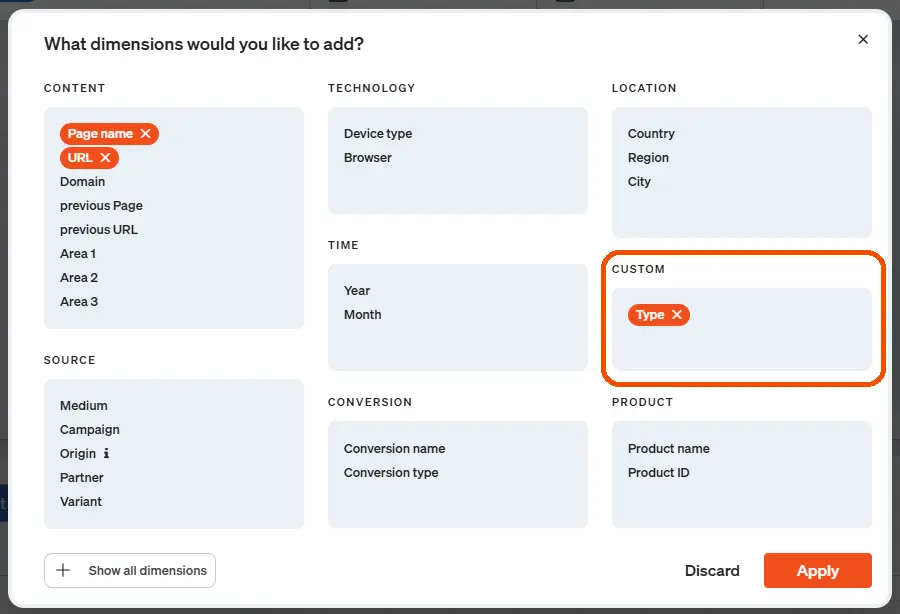
var et_seg1="[Wert]";http://www.meineseite.de?etcc_cmp=Sommer&etcc_med=Display&et_seg1=[Wert]onmousedown="et_eC_Wrapper({et_et: accountkey1, et_pagename: Login-Startseite, et_seg1: [Wert]});To apply your own dimensions to the data of a report, click on + Dimension in the report. In the dimension selection, the custom dimensions are displayed as a separate tile. Select the corresponding custom dimension by clicking on the dimension name and then on Done. The dimension information is then also displayed in the report.
Campaign dimensions
In addition to the required medium and campaign parameters, etracker analytics offers many other parameters for granular measurement and evaluation of marketing activities.
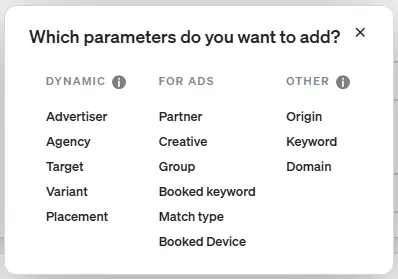
The five parameters of the DYNAMIC group can be easily renamed and adapted to your own requirements.
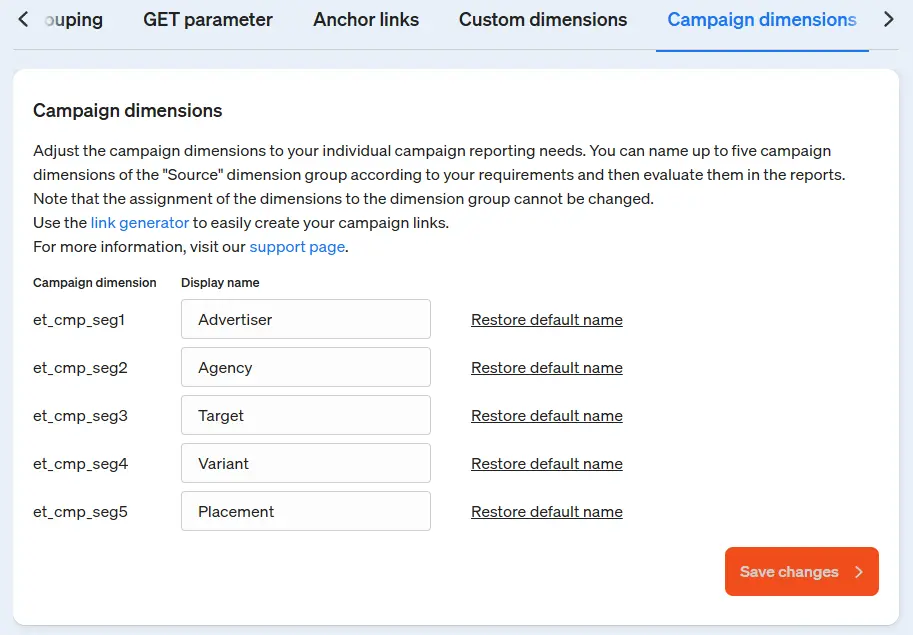
The customized campaign dimensions are then available in the campaign link configurator so that the corresponding campaign information can be transferred.
Product variants
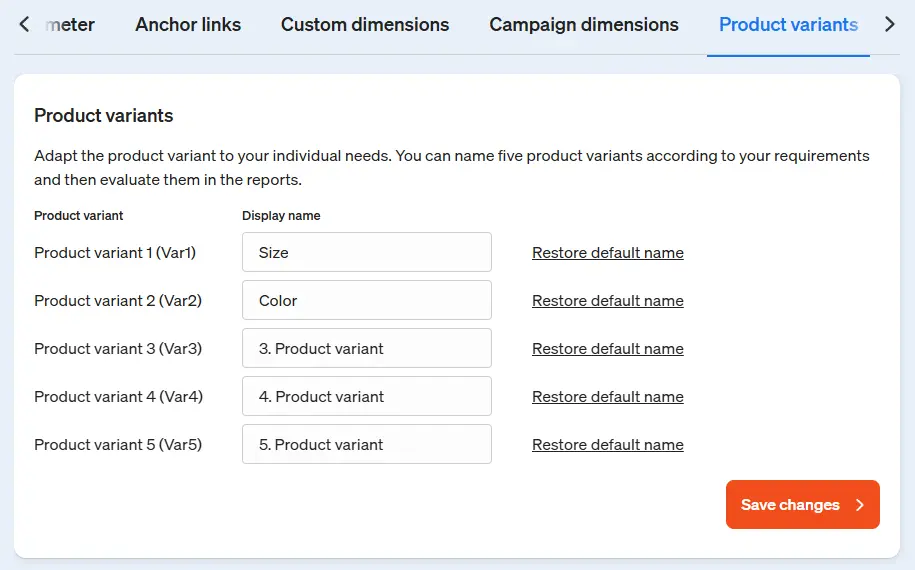
Similar to individual designations for campaign dimensions, the designations for product variants can be customized. These are numbered by default. When using product variants in the e-commerce analysis, it is recommended to replace these with the variant types used, such as “size” or “color”.
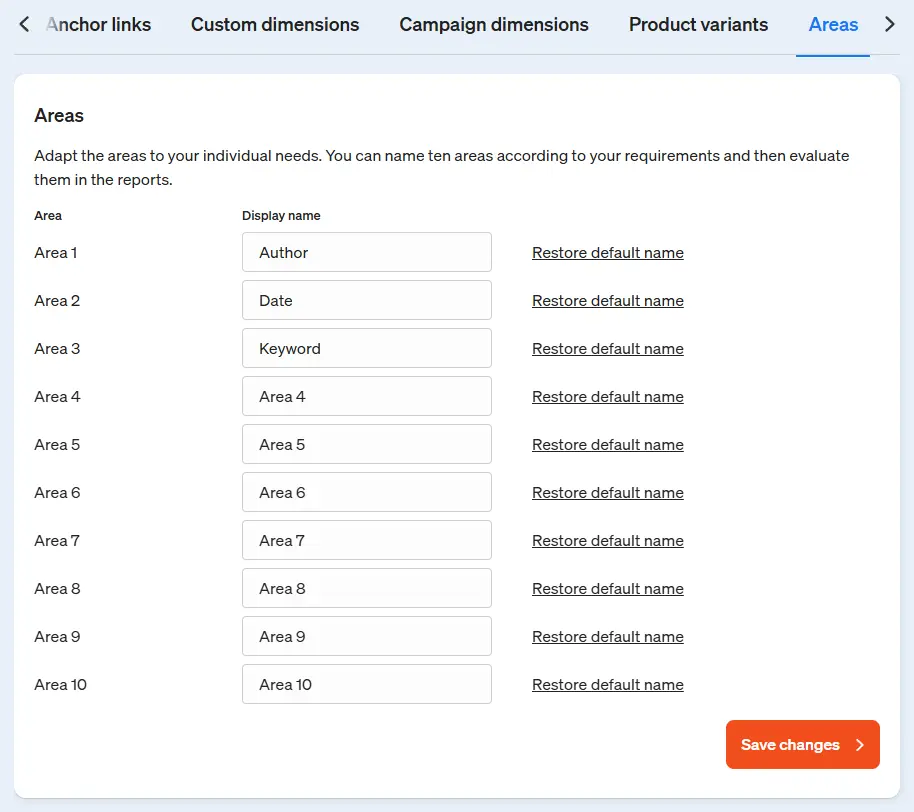
Areas
Page areas are used to record additional information about pages and to group or select them. By default, the various levels can be automatically adopted as sections from the path within the website hierarchy (e.g. Clothing > Men > Trousers > Jeans). Alternatively or additionally, information such as author, creation date, keywords etc. can be entered via area parameters.
To do this, adjust the corresponding area names. The information can then be transferred via the corresponding area parameters in the tracking code.
Alternatively, page-related information can also be collected via the etracker tag manager without interfering with the website code.
