Connector for Google Looker Studio
Easy creation of reports from etracker analysis data in Looker Studio
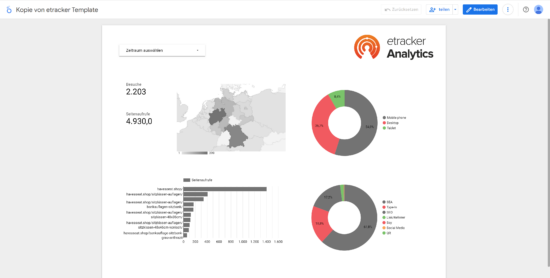
Looker Studio enables the creation of reports with data visualizations that can be shared within the organization, with external partners or customers. In conjunction with the etracker Connector, instant cloud-to-cloud access to all etracker analytics data is possible – without manual uploading or scripting, just plug & play.
The most important functions of the Looker Studio are
- Data combination and merging
- Reporting and dashboarding
- Data visualizations
- Collaboration and access rights
In the following, we will show you how easy it is to create reports from etracker analytics data in Looker Studio.
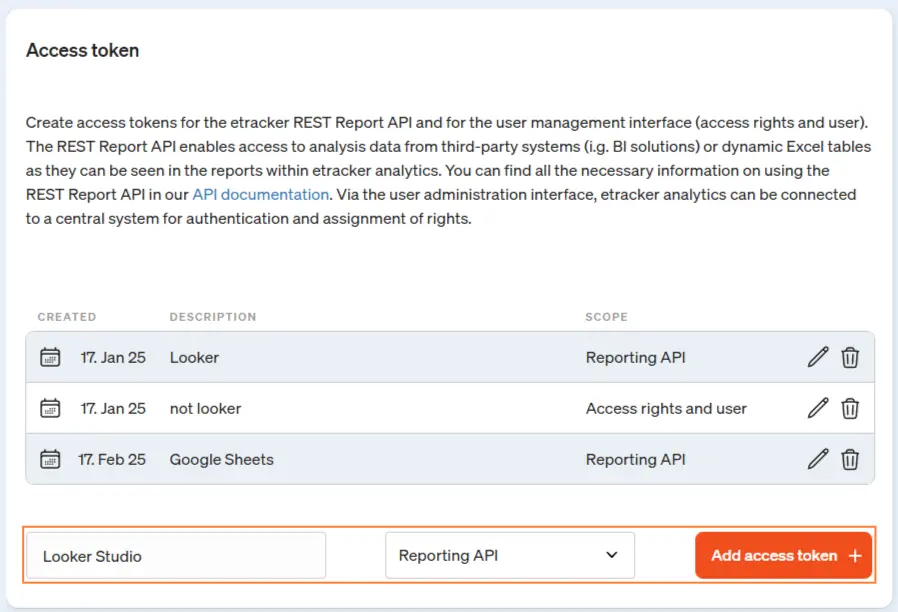
The etracker Connector requires an etracker analytics Enterprise Edition. To use it, you need an access token for the etracker report interface (REST Report API). You can create this as an administrator/(main) user in the etracker account under Integration → Access token.
Connection to etracker analytics from Looker Studio
Looker Studio uses a direct point-and-click interface to connect to data sources. Follow these steps:
- Register with Looker Studio at this address: https://datastudio.google.com/.
- Click on Create in the left-hand menu and then on Data source.
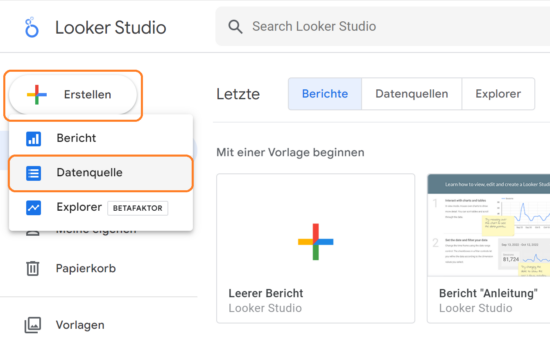
- Enter etracker in the search and select the etracker Connector from the available data sources.

- Click on Authorize and allow the etracker application via Google authentication.
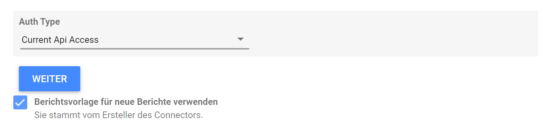
- Select the option Current Api Access as “Auth Type”. The legacy method is still supported, but no longer recommended.enter your e-mail address and the API token in the following window to connect to your etracker REST access.
- Enter your access token for the etracker REST Report API. Enter your etracker account ID and the corresponding password in the next step.
- Select a report and use the etracker report template if required.
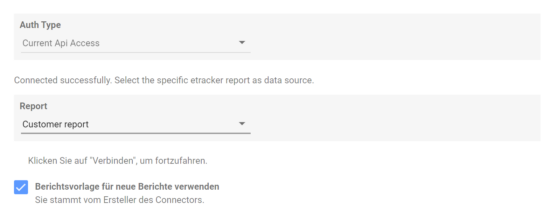
Tip: The most comprehensive set of segments and metrics is available in the Customer report. - Click on Connect in the top right-hand corner to activate the connector.
Report creation in the Looker Studio
As soon as the connector is activated, you can edit the imported attributes and metrics. Various options are available: Rename, delete, select data type, aggregation, change description, add a field, etc.
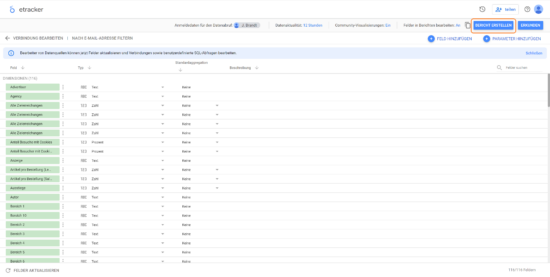
You can also configure the general options of the dashboard, such as the timeliness of the data, the activation of visualizations created by the community or the ability to edit a field directly in the report.
Once set up, click on Create report in the top right-hand corner to start creating a report or dashboard.
The connector is based on the etracker REST Report API. In Looker Studio, query constellations are also possible that produce incorrect queries, but the corresponding error messages from the API are not displayed. In these cases, it is therefore not an error in the connector, but an improper configuration of the report. Caution should also be exercised when calculating totals for visit and visitor numbers.
If you want to add data from different sources or other etracker accounts, click on Add data in the menu.

Then select the etracker Connector from the available data sources. Then enter the access token for the other etracker account and select the desired etracker report as the data source.
The number of different data sources in Looker Studio is limited to a maximum of five. If data from more than five etracker accounts is to be merged, we recommend using Google Sheets or BigQuery. These allow queries to be made via the etracker REST Report API in order to first generate an overview table from many etracker accounts. This overview table can then be accessed as a data source in Looker Studio.
You can find help for using and operating the Looker Studio here.