Shopify
Integration into a Shopify webshop is very simple and only takes a few minutes. This allows you to benefit from data protection-compliant, cookie-free and consent-free web analytics and thus avoid data loss due to consent requirements.
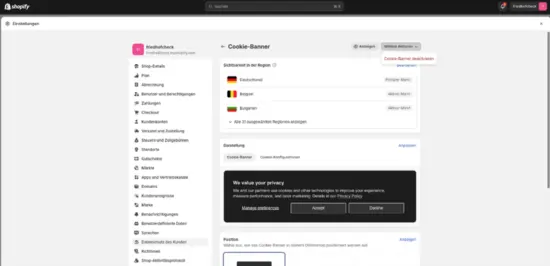
Shopify’s integrated Consent Management is very limited and cannot distinguish between different purposes. Therefore, it must not be activated! Instead, we recommend using the tag and consent management integrated in etracker analytics.
A particular advantage is that Shopify’s native functions can be used to record eCommerce events: Product seen, added to cart and purchase with item name, category and price.
The following data is also collected automatically:
- All page views with domain, URL and page title as well as assignment to areas based on the URL structure
- Internal searches
- Origin: Referrer domain and path, organic search term (if provided), classification of traffic by medium (direct, search, social media, referrer)
- Geo-information
- Technical information: Device type, device name and manufacturer, operating system and version, browser, version and language
- All external, mailto and telephone link calls and downloads as click events
- Playable media (videos, podcasts, music) as events
- Scroll events per page (0-9%, 10-24%, …)
Implementation of customer events
Please proceed as follows:
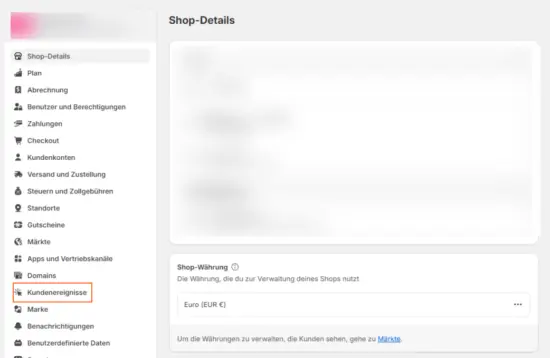
- Log in to your Shopify account
- Open the settings of your store and select Customer events in the menu:
- Click on Add custom pixel, enter a name of your choice, e.g. “etracker connector” and confirm by clicking on Add pixel.

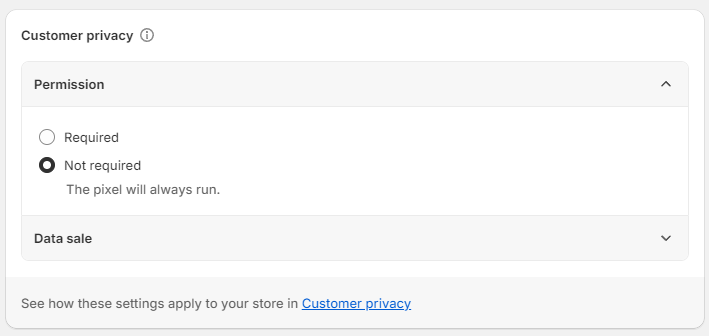
- Select Not required as permission.
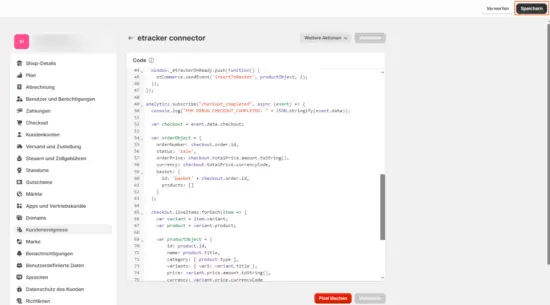
- Download and paste the customized etracker code: https://code.etracker.com/shopify_pixel.js. For the etracker code with your own tracking domain, click here.
- Replace
<INSERT_ACCOUNT_KEY_HERE>with your individual etracker account key. You can find this in your etracker account under Account → Account → Account key. - Click on Save in the top right corner.
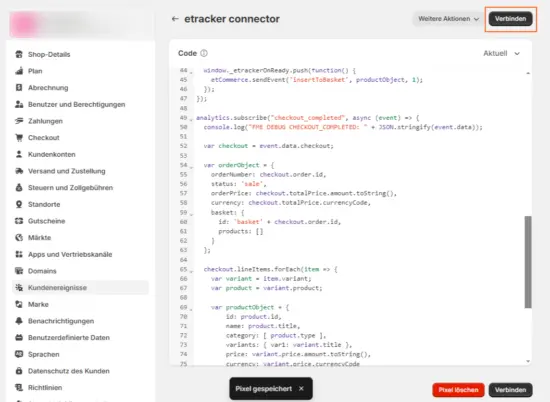
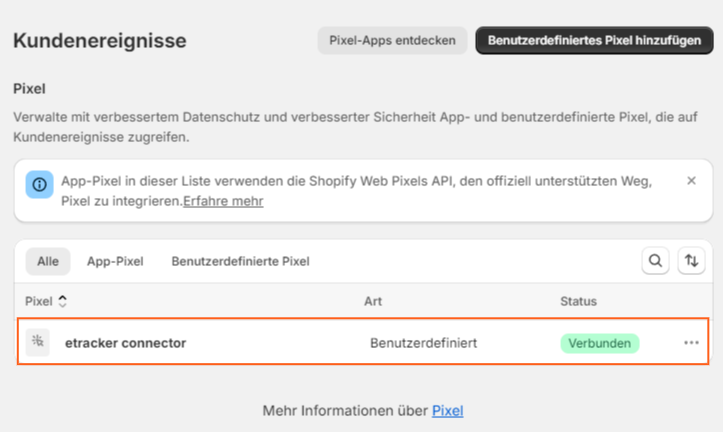
Done! In the overview of customer events , you will now find the custom pixel you just created with the status Connected.
Implementation in the theme
Carry out the following steps to integrate the etracker code into the theme:
- In the Shopify admin area, go to Sales channels → Online store → Themes. Click on Edit code under the three dots and paste the etracker code available at the following link into the head section of your theme.liquid:
https://code.etracker.com/shopify_theme.txt or here with your own tracking domain - Replace
INSERT_ACCOUNT_KEY_HEREthrough your individual account key. You can find this in your etracker account under Account → Account → Account key.
Done!