Typo3
Typo3 (Version 11, 12 & 13)
A plugin from etracker is also available for Typo3 versions 11, 12 and 13. The plugin inserts the new data protection-compliant etracker code and also ensures that a service worker for our Signalize product is stored and accessible.
Installation is completed in just a few steps:
You can download the new Typo3 plugin here
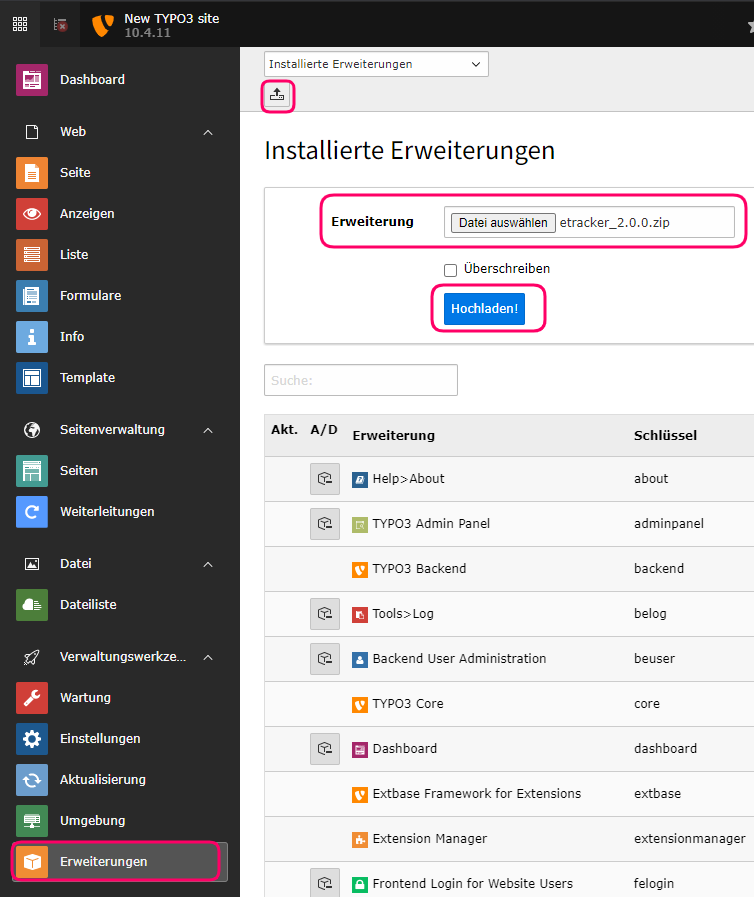
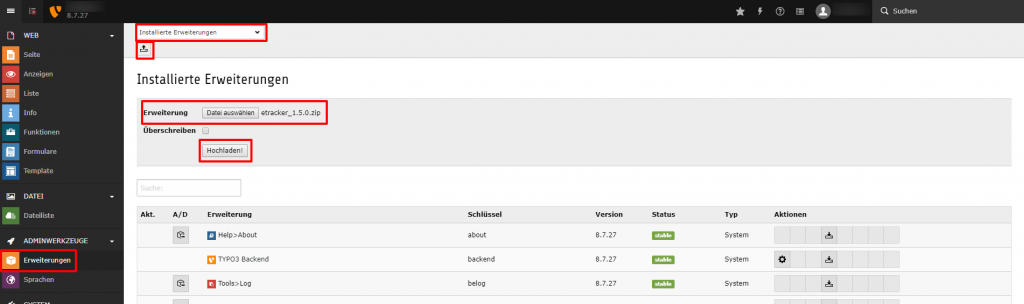
Log into the Typo3 backend as an administrator and open the extensions under admin tools. Select the Installed extensions entry in the drop-down menu and click on the upload icon. Select the extension you have just downloaded and upload it. The plugin does not need to be activated afterwards.
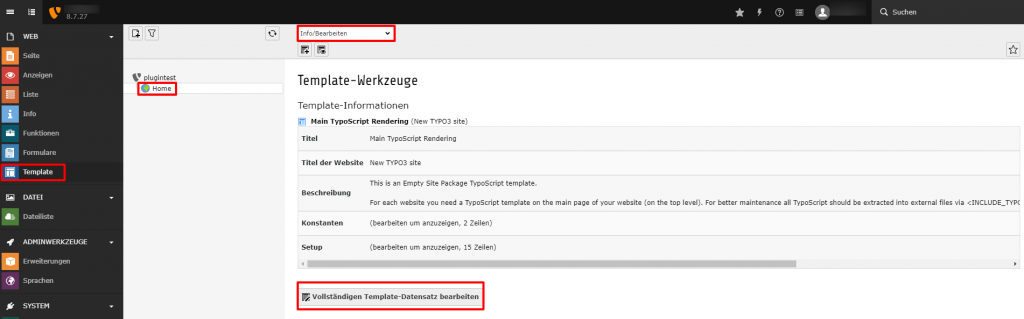
The next step is to add the plugin to the website template. To do this, select the template to which the plugin is to be added in the left-hand column under Template. Select Info/Edit from the drop-down menu and then Edit complete template data set.
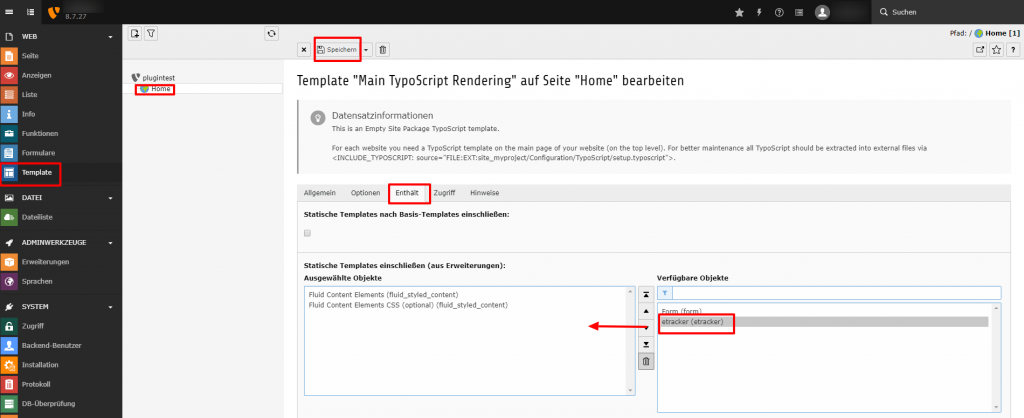
Under Template Contains , click on the available object(etracker (etracker)) and move it to the Selected objects. Then save.
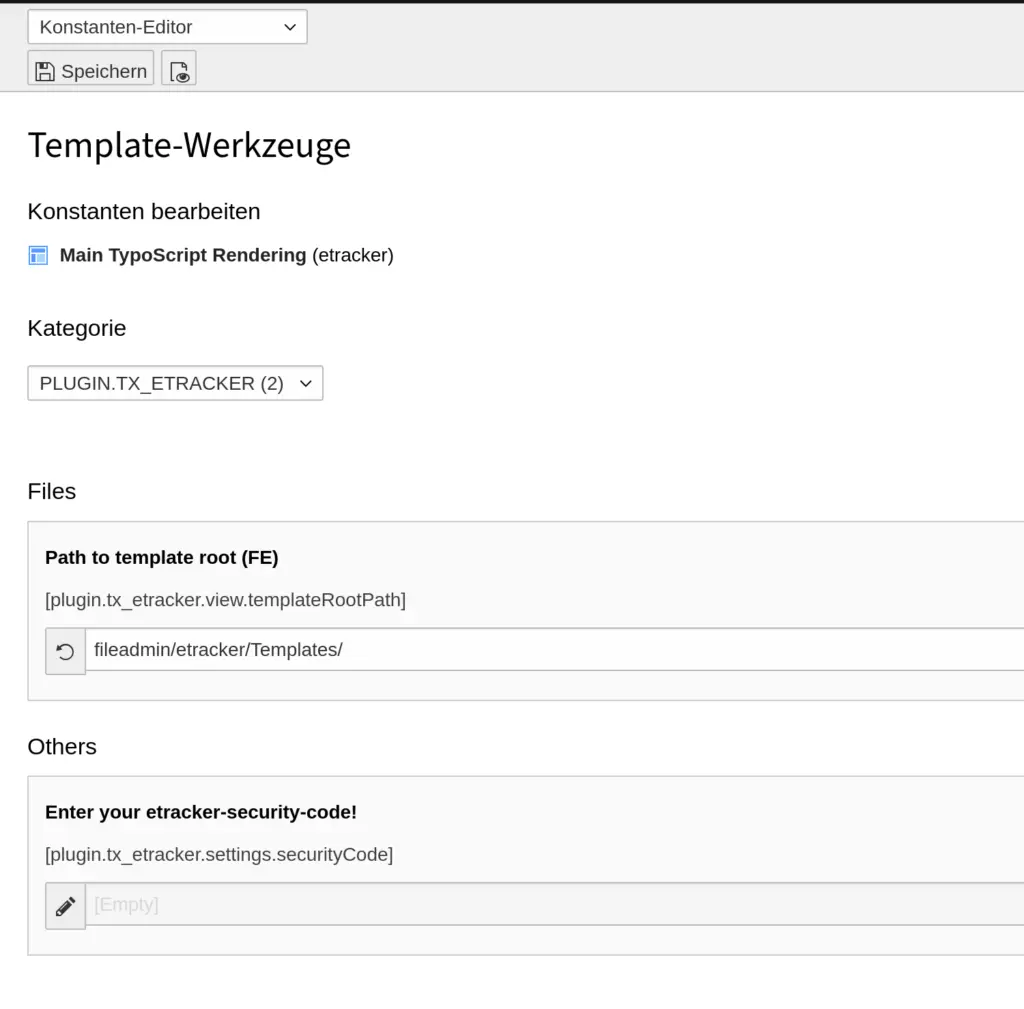
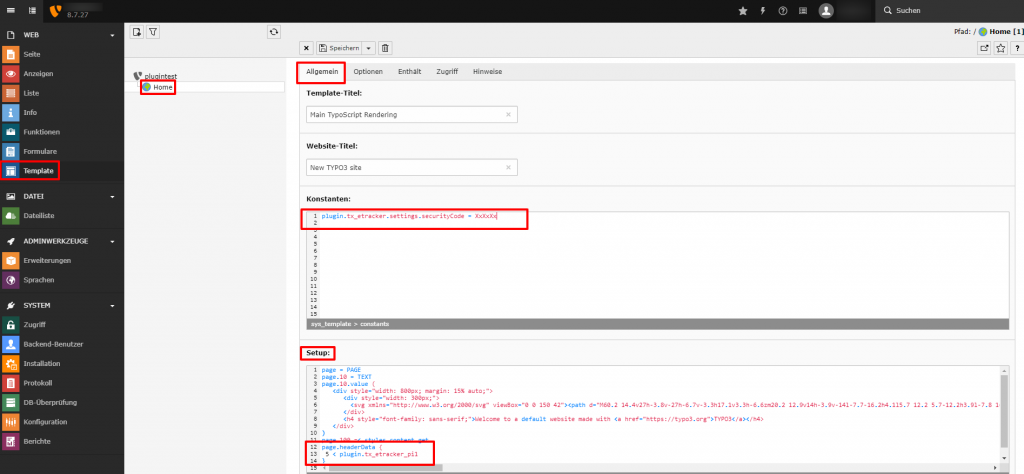
Now you should add your personal etracker account key as a constant in the template. To do this, navigate to the General tab and insert the following constant:
plugin.tx_etracker.settings.securityCode = Account-Schlüssel 1You can find account key 1 in etracker under the item Account → Account → Account key.
Manual transfer of parameters
If etracker parameters are to be transferred manually, for example for the integration of etracker with a consent management tool, this is possible as follows:
Copy the template from typo3conf/ext/etracker/Resources/Private/Templates/Etracker.html to e.g. /fileadmin/etracker/Templates/Etracker.html
Then enter the new path in the Constant Editor under the category PLUGIN.TX_ETRACKER → Path to template root.
New parameters can now be inserted in the template Etracker.html.
As an example, the parameter et_areas is inserted here
  <!-- Copyright (c) 2000-2021 etracker GmbH. All rights reserved. -->
  <!-- This material may not be reproduced, displayed, modified or
   distributed -->
  <!-- without the express prior written permission of the copyright  holder. -->
  <!-- etracker tracklet 5.0 -->
  <script type="text/javascript">
  // var et_pagename = "";
  var et_areas = "{areas}";
  // var et_tval = 0;
  // var et_tsale = 0;
  // var et_tonr = "";
  // var et_basket = "";
  var _etr = {
    signalizeServiceWorkerPath: "typo3conf/ext/etracker/Resources/Public/Js/sw.js",
    signalizeServiceWorkerScope: "typo3conf/ext/etracker/Resources/Public/Js/"
  };
  </script>
  <script id="_etLoader" type="text/javascript" charset="UTF-8"
  data-block-cookies="true" data-respect-dnt="true" data-plugin-version="Typo3910_1.0.0"
  data-secure-code="{settings.securityCode}" src="//code.etracker.com/e.js" async></script>
  <!-- etracker tracklet 5.0 end -->
The parameter can then be set in the page template via typoscript.
  page {
    headerData {
      567890 {
        variables {
          areas = TEXT
          areas.value = MyArea
        }
      }
    }
  }
Typo3 (Version 7, 8, 9, 10)
Only a few steps are required to conveniently integrate etracker into a Typo3 environment. The installation instructions refer to this plugin version for Typo3 version 7 & 8.
The plugin supports Typo 3 versions 7, 8 and 9.
Log into the Typo3 backend as an administrator and open the extensions under admin tools. Select the Installed extensions entry in the drop-down menu and click on the upload icon. Select the locally saved extension and upload it. The plugin then requires no further activation.
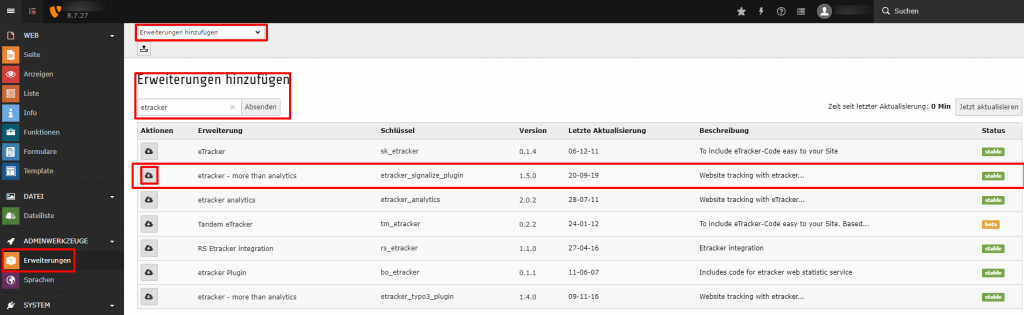
Alternatively, you can also download the etracker extension from the TYPO3 Extension Repository (TER). Proceed as follows:
Select Add extension from the extensions drop-down menu and search for the etracker plugin in the search field. Download and install the current version of the etracker plugin using the icon under Actions. The plugin is already activated after this action.
The next step is to add the plugin to the website template. To do this, select the template to which you want to add the plugin in the left-hand column under Template. Select Info/Edit from the drop-down menu and then Edit complete template data set.
Under Template contains, click on the available object(etracker (etracker)) and move it to the Selected objects. Then save.
Now you should add your personal etracker account key as a constant in the template. To do this, navigate to the General tab and insert the following constant:
plugin.tx_etracker.settings.securityCode = Account-Schlüssel 1You can find account key 1 in etracker under the item Account → Account → Account key.
In addition, the following must be inserted in the setup of the main template:
page.headerData {
 5 < plugin.tx_etracker_pi1
 }
The following value is only stored in the setup if the eCommerce API is to be used:
page.20 < plugin.tx_etracker_pi2Within the page properties, you will now find the etracker tab. You have the option of assigning the page to one or more areas using the checkbox.
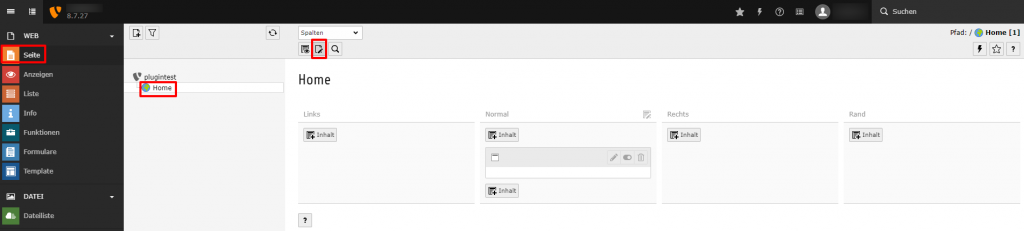
If the pages are eCommerce pages (e.g. article page or shopping basket), you have further options for transferring events to etracker under the etracker (eCommerce) tab. Under Event, you can select which event should be measured (e.g. insertToBasket)
On relevant pages, you can use the status to define whether it is a lead or a sale
You can assign a unique ID (such as a product number or item name) to individual items.
On article pages, you can assign the article to one or more categories.
Download the Typo3 plugin for versions 7 and 8:
Download the Typo3 plugin for versions 9 and 10: