Integration of third-party tags
You can use the etracker tag manager to send data to etracker analytics as well as trigger tags from Google, Meta etc.. The special advantage here is that triggering is automatically linked to the etracker consent manager and therefore only takes place with the appropriate consent. This means that you only have to maintain third-party tags in one place. You can also access all data collected in etracker analytics for third-party tags. This makes management very simple, efficient and avoids errors.
The etracker tag manager can also be used in combination with external consent management solutions. The link is made via special variables and triggers and must be taken into account each time third-party tags are configured.
Prerequisites
- To display standard third-party tags, you need at least an etracker analytics Pro or Enterprise Edition.
- To display custom third-party tags (custom code), you need an etracker analytics Enterprise Edition.
Optionally, only the tag and consent manager modules can be upgraded to the Pro or Enterprise level.
Standard and user-defined tags
The tags from Google, Microsoft Ads, Meta, TikTok and LinkedIn Ads are preconfigured by default. The individual associated tags can be selected by clicking on the respective entry.

Any individual codes can be integrated via the option </ > Custom. With the custom tag, you can choose between global display on all pages and targeted triggering.
Configure tags
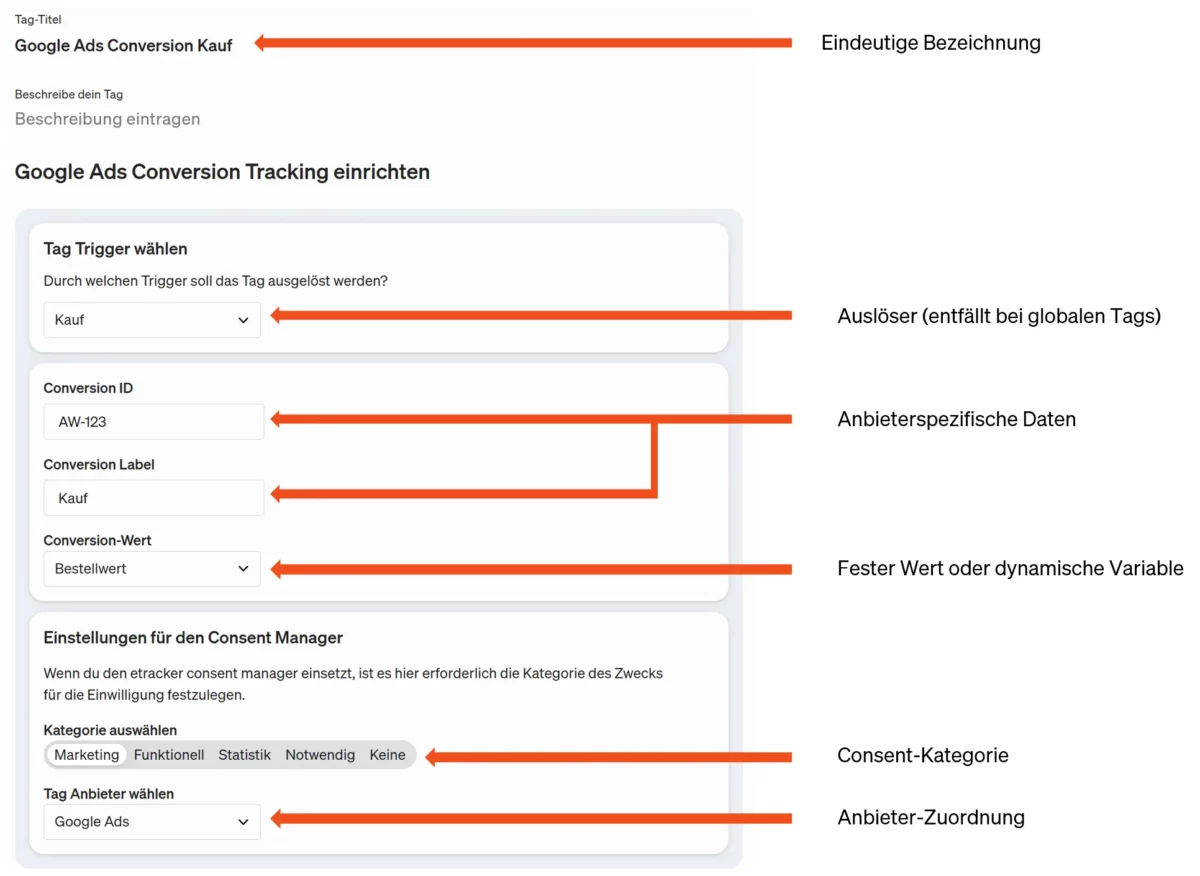
After selecting the tag type, you can make all the necessary and optional settings for the tag. This always includes an individual title or name and an optional description.
With global or basic tags, there is no need to define triggers and variables, as they are controlled on all pages and only contain the assignment to the provider accounts. Otherwise, tag management always involves the combination of tag and trigger. The trigger is used to determine when the tag is used. Variables can optionally be used to add dynamic content.
The assignment to a consent category and the respective provider is also part of the tag configuration. This information can be used to control consent management and display the appropriate information in the detailed view of the consent dialog.
Once the configuration is complete, the tag can be published directly or saved as a draft. Both the live tag and tag drafts can be tested via the debug mode.
Checking using debug mode is always recommended to avoid errors from the outset.
Created tags can be edited again at any time or used as an aid when creating further tags using the copy function. Changes are automatically documented in the change history.
This gives you secure control of all third-party tags and a perfectly integrated solution for analytics, consent and tag management.
Linking with external content tools
Procedure for linking to an external Consent Management Platform (CMP):
- Create variable
Create a variable in the etracker tag manager that contains the user’s consent status. Depending on the CMP used, this can be a value from a dataLayer event or an entry in the session storage or local storage, for example. - Create trigger
Define a trigger in the etracker tag manager that uses a regular expression (RegEx) to check whether the value of the variable from step 1 contains consent for the desired category. - Define trigger group
Create a trigger group in the etracker tag manager as a trigger for the desired tag. The trigger group consists of- the trigger defined in step 2 (consent available), and
- one or more additional triggers that should trigger the desired tag under the intended conditions (e.g. user-defined events or URLs).