Integration in Google Tag Manager
Below you will find instructions on how to integrate the etracker website code via the Google Tag Manager. Please note here:
- When using the Google Tag Manager, there are often timing problems that can lead to data not being recorded correctly. This integration method is outside the scope of our support. We recommend integrating the etracker code directly into the <head> of the website and using the etracker tag manager to ensure smooth integration. Google Tag Manager containers can be imported into etracker tag manager including third-party tags, making migration quick and easy.
- The integration of etracker analytics via Google Tag Manager can thwart consent-free data collection without cookies. The Administrative Court of Hanover ruled as follows (Ref. 10 A 5385/22 of 19.03.2025): “The use of the Google Tag Manager service requires consent in accordance with Section 25(1) TTDSG and Art. 6(1)(a) GDPR.”
“The use of the Google Tag Manager service is merely the easiest, as the tool is free and works well. The transfer of personal data, in particular to Google as one of the most widespread players on the Internet, whose business model is, among other things, to collect data for its own commercial use, cannot be justified merely on the grounds of simplicity with regard to the fundamental rights concerned.”
Step-by-step instructions:
- Sign in to Google Tag Manager with your Google account email and password: https://www.google.com/intl/de/tagmanager/
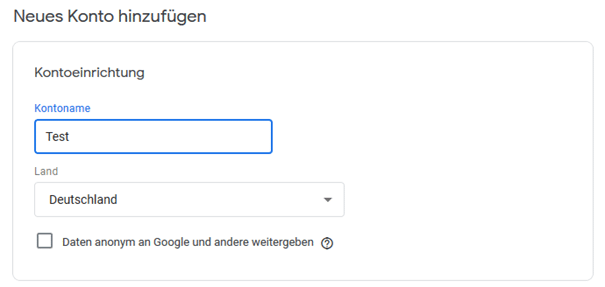
- Set up an account for a company and click Next.
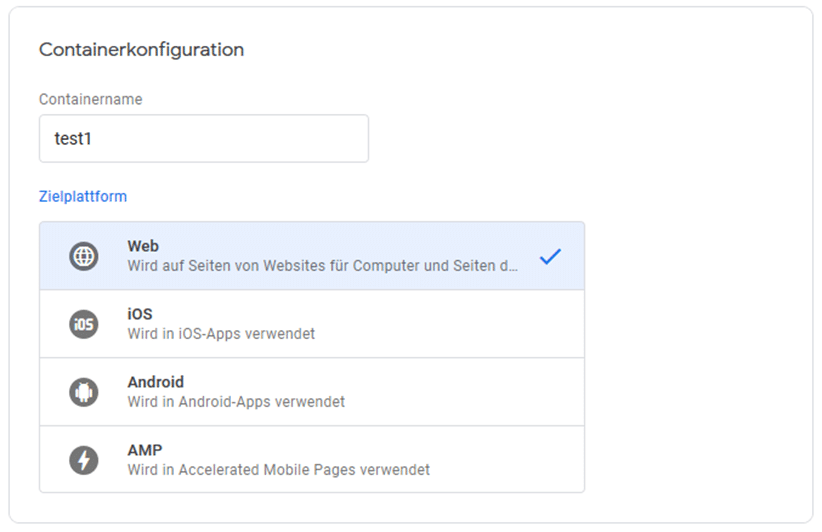
- Next, set up a container for the company’s website that contains the tags to control the tracking code. Then click on Create account and container.
- Accept the terms of use of the Google Tag Manager. A generated container snippet is displayed in the following window.
- Integrate the container snippet displayed in the window on every page of your website as described there.
- Now add a data layer to your website that contains the etracker parameter values in JavaScript variables. You can find instructions on how to do this at: https://developers.google.com/tag-manager/devguide
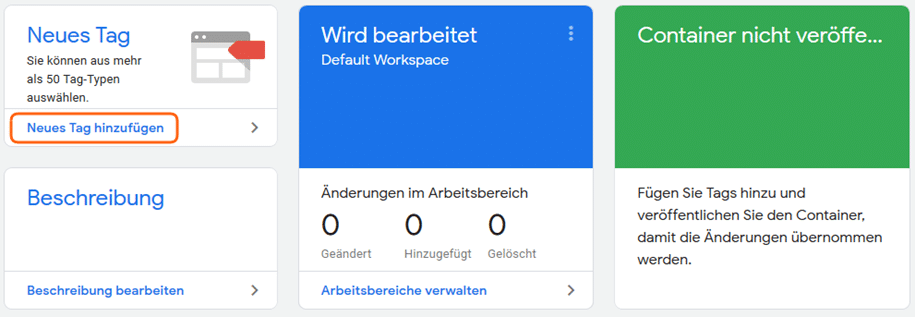
- Now click on Add new tag.
 Then click on Tag configuration.
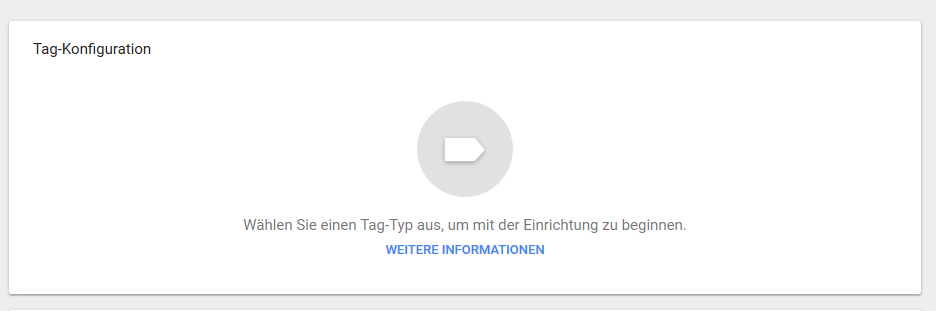 And then on Custom HTML tag to add a tag with your etracker tracking code to your container.
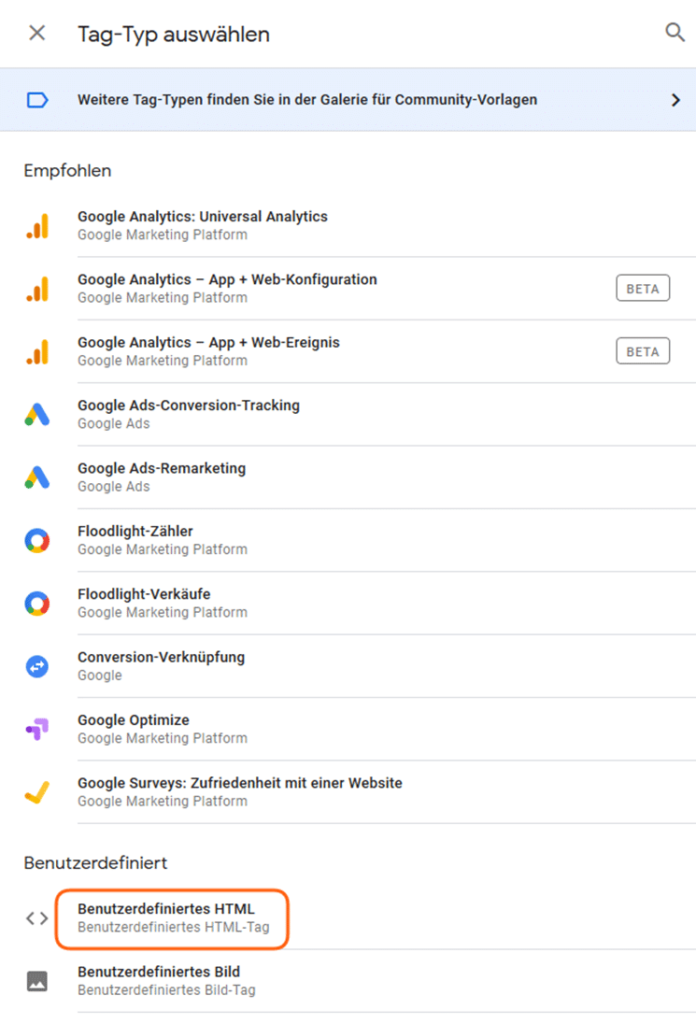
- Activate the checkbox for document.write support. This is important so that the attributes (e.g. data-secure-code) are taken into account when called. Otherwise they will not be executed by the Google Tag Manager, even though they are visible in the container setup!
In order for the tag to be created, it is now necessary to select a trigger and confirm by clicking on Save.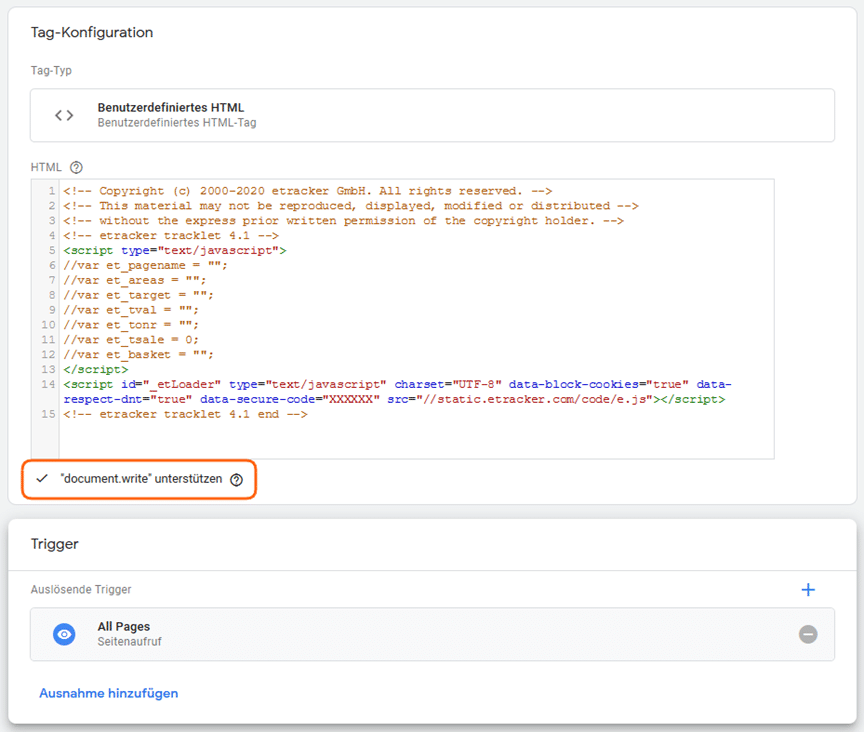 Add a trigger rule for All pages. Copy the tracking code from the etracker application under
 Integration → Website Code , paste it into the HTML window and adapt it to your website by assigning the variables from your data layer to the JavaScript variables of the tracking code. Finally, click on Save. - Remove the etracker tracking code from your website and click on Publish to deliver the container with the tag to the website.