Pinterest Ads Connector
Setting up Pinterest Ads conversion tracking
Below we will show you how to set up the campaign measurement of Pinterest Ads and the automatic transmission of conversion data to Pinterest.
The automatic upload of conversion data to Pinterest makes it possible for you,
- see the conversion rates and sales of your campaigns directly in the Pinterest Business Manager, so that you can manage campaigns completely there.
- conversions and sales for automatic bidding strategies such as target CPA or target ROAS.
Prerequisites:
- etracker analytics Pro or Enterprise Edition with administration rights
- Access to the Pinterest Business Manager
- Conversion actions are set up in etracker analytics – either as orders (leads), purchases (sales), target achievements (in conversion processes) or tag manager conversions
The facility consists of these points:
- Creating a token in the Pinterest Business Manager
- Setting up Pinterest Ads campaign tracking.
- Optional (recommended): Set up the Pinterest conversion tag.
To optimize the measurement accuracy of your Pinterest Ads despite the increasing limitations of classic cookie and URL parameter tracking, etracker supports the use of Enhanced Conversions. This is activated by using the corresponding variable“Data provided by users“. Please take into account the legal requirements and consent adjustments.
Setting up the Pinterest Ads conversion upload
The setup is completed in just two steps:
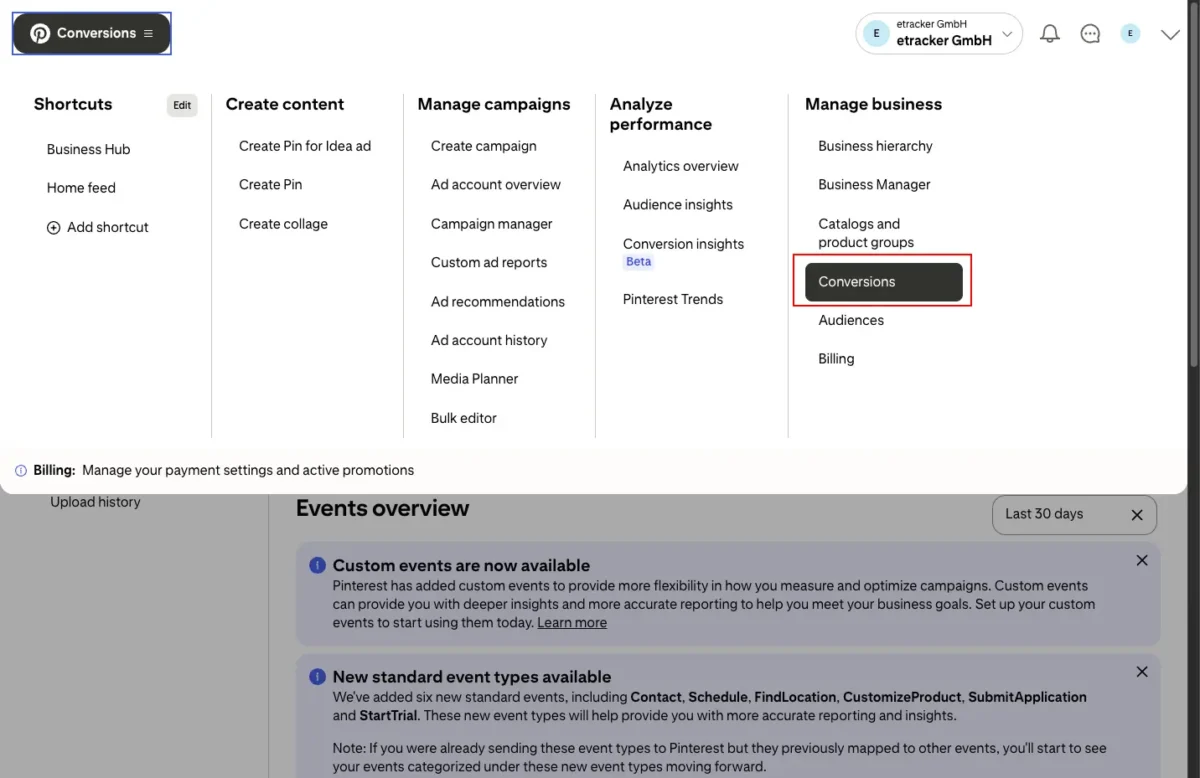
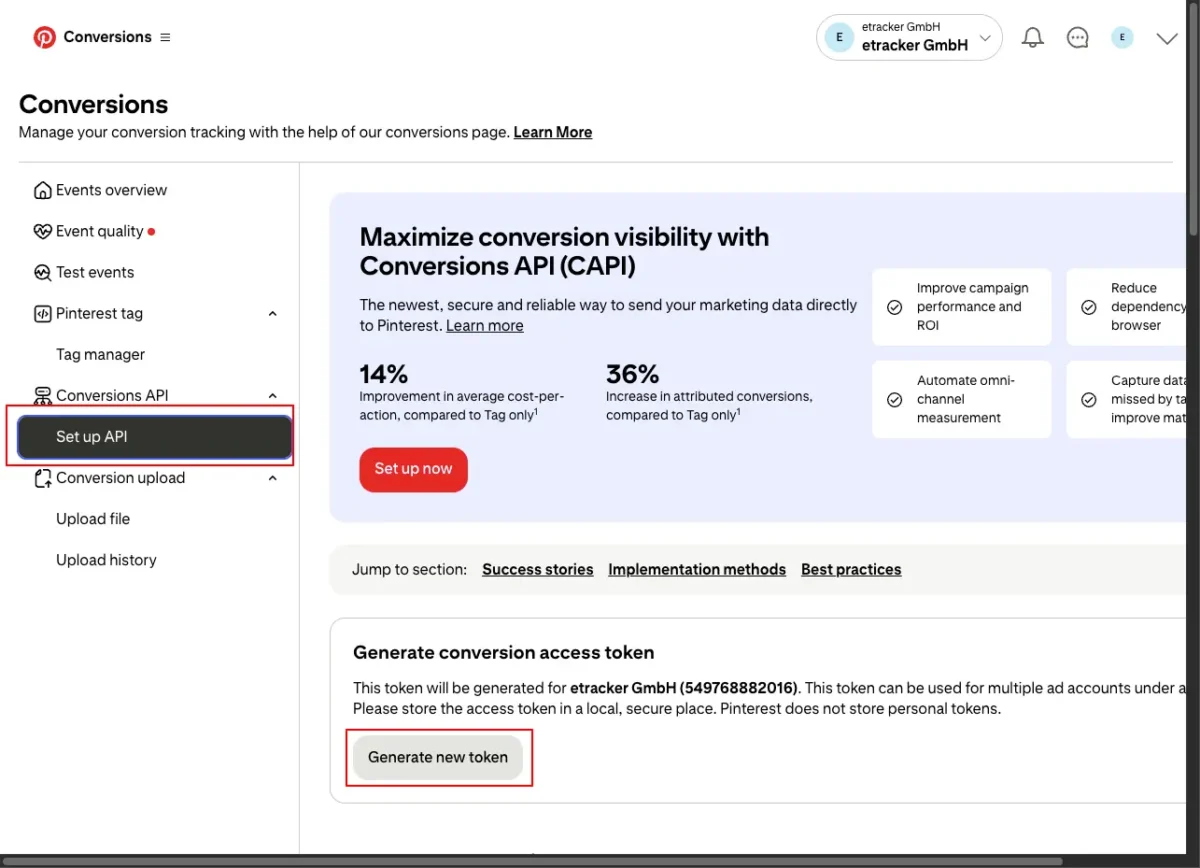
Step 1: Create conversion access tokenTo create an access token, click Manage → Conversions → Set up API → Generate new token in the Pinterest Business Manager menu bar.
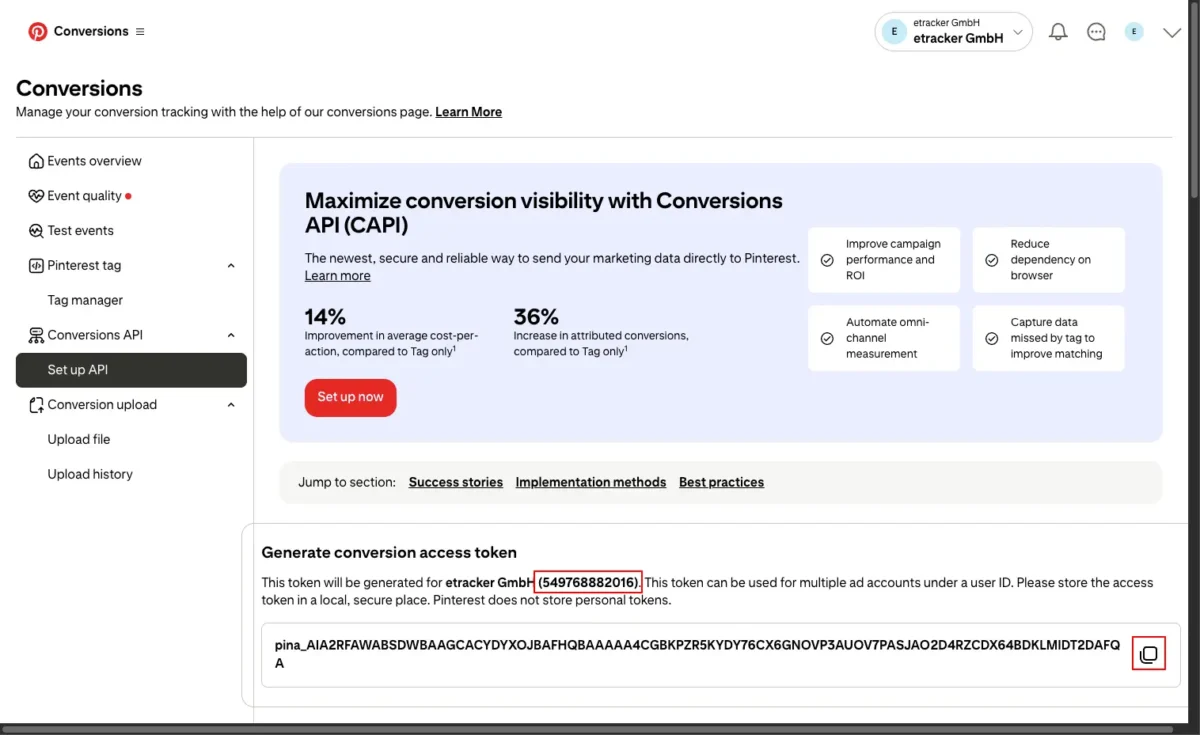
Copy the token and the account ID of your Pinterest account:
Step 2: Setting up the conversion upload in etracker analyticsGo to Configuration → Conversion upload:
Add the access token and account ID created in step 1 and click on Save.
Setting up the Pinterest Ads campaign tracking
In your Pinterest Business Manager, go to Ad Accounts and select the relevant account.
Select Settings → Edit parameter settings and also check the box next to
Click on the parameters and values fields to copy the displayed parameter. Add the parameters and the corresponding values one by one.
Click on the parameters and values fields to copy the displayed parameter.
This means that all visits via Pinterest Ads are recorded in etracker analytics with the associated campaign information and conversions are attributed according to the attribution models.
Setting Up the Pinterest Conversion Tag
The combination of Pinterest tag and conversion upload via etracker analytics requires that the Pinterest tag is controlled via the etracker tag manager.
This ensures that identical conversion actions are not counted twice, but are deduplicated by Pinterest. etracker automatically generates unique conversion IDs for this purpose.
In order to achieve the deduplication of conversions, the Pinterest conversion tag activated in the etracker tag manager
- are triggered on the same websites as the uploaded etracker conversion,
- contain the same name as the etracker conversion and
- contain the same value as the etracker conversion.
The following is an example of the process using the conversion purchase, which is recorded using the etracker store plugin or etracker e-commerce event.
First, set up a trigger that triggers a purchase in the etracker e-commerce event. To do this, go to tag manager → My triggers → Add trigger → etracker events. Select E-Commerce Event and then Purchase in the dropdown:
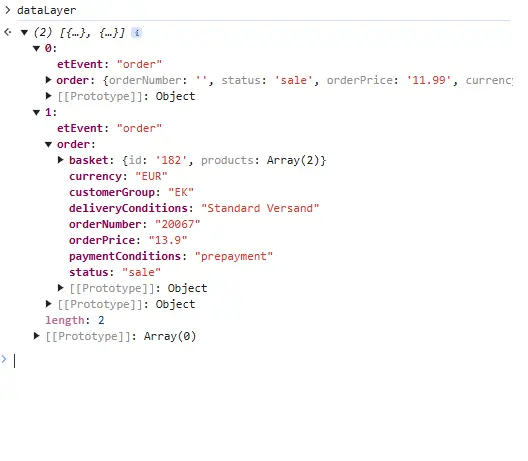
Then create a variable for the order value. If you use one of the etracker store plugins or the e-commerce API, all e-commerce events are pushed to the data layer. The data layer can thus be used to transfer the order value in a Pinterest tag. The Datalayer entry for a purchase looks like this:
You then create a variable for the order value. If you use one of the etracker store plugins or the e-commerce API, all e-commerce events are pushed to the data layer. The data layer can thus be used to transfer the order value in a meta tag. The Datalayer entry for a purchase looks like this:
To do this, go to tag manager → My variables → Add variable → Datalayer.
Enter any variable title such as “Order value” as the name of the data layer “dataLayer” and as the name of the data layer variable “order.orderPrice”. Proceed in the same way for the order quantity and order number variables.
Finally, set up the Pinterest conversion tag using the previously created variable and trigger. To do this, go to tag manager → My tags → Add tag → Pinterest Pixel → Conversion Tracking.
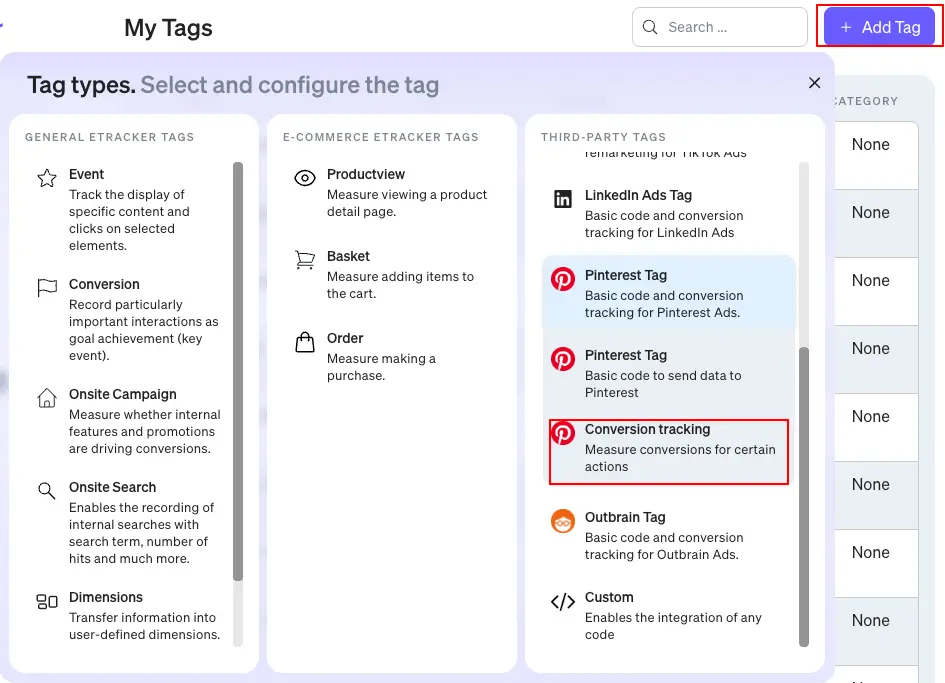
Next, enter a free tag title, select the trigger you just created as the trigger and select the appropriate Pinterest event (in this case checkout). If necessary, adjust the currency and change the value to the variable created for the order value.