etracker consent manager
There is a free video course about the etracker setup on our etracker e-learning platform, in which the configuration of the Consent Manager is presented in detail.
Click here to go directly to the matching video:
https://academy.etracker.com/path-player?courseid=etracker-profi-setup&unit=699c24be269b7590c4020acdUnit

With its integrated consent and tag management, etracker offers a simple and practical all-in-one solution for managing consent and controlling third-party tags conveniently and in compliance with data protection regulations. This offers the great advantage that all consent settings are made at the same time when new tags are integrated. This simplifies integration enormously and prevents data protection errors.
Therefore, only the more or less unique basic settings are made under the consent manager menu item:
Type of consent for etracker analytics
As a rule, when using etracker analytics, only the activation of analytical cookies requires the prior consent of website visitors. If a weighing of interests, e.g. due to individually configured data enrichment or the transfer of data to third parties, leads to the website operator’s interests not prevailing, data processing with etracker analytics can be linked to consent. In this case, select the Tracking Opt-In option.

Dialog type
Select whether the consent dialog should appear in the form of a banner at the bottom of the screen or a narrower box. The box can be positioned on the left, right, top or bottom. In addition, the Contents of the actual website can be blocked and darkened. This forces interaction with the content dialog.

Design & Text
All colors and texts can be edited directly in the preview and adapted to your own website or corporate design.

Simply click on the respective element to view the editing options or change texts. The background color can be adjusted via the display below the dialog. Use the language button to switch between the languages previously selected using the + sign.

Be sure to check the links to the privacy policy and imprint by clicking on the entries and the respective link symbol.

To return all colors and texts to their original state, click on Reset to default values in the top right-hand corner of the section.
To display your own logo in the dialog, adjust the branding option. With Hide , you do not display a logo, which streamlines the dialog display and can therefore speed it up.

If several language versions have been selected, you can decide which language appears by default: either according to the browser settings of the respective visitor or according to the selection. The arrow for changing the default language appears on mouseover.

Trigger to withdraw consent
Now configure the option for visitors to adjust their consent at a later date. According to Art. 7 para. 3 sentence 4 GDPR, it must be possible to withdraw consent just as easily as to give it. This can be achieved either via a floating button or a link in the footer of the website. As a floating button, a separate image can optionally be selected as an icon.

Block and release external content
If third-party services are used on the website to display contents such as videos or maps via iframes, it is important, on the one hand, to prevent the automatic setting of cookies and the transmission of data to third-party services without prior consent and, on the other hand, to give visitors the option to enable selected contents.
Visitors are first shown a notice regarding the externally embedded contents and can then decide whether or not they want to consent to the display.
To configure this properly, you must first determine whether the provider is a service you are already familiar with or a new provider.
For the following providers or URLs, you simply need to specify—when embedding the external Contents via an iframe—that the Contents should only be displayed after consent has been given. The provider’s name to be displayed, as well as the association with the corresponding provider for consent, is then determined by the URL (see Step 1):
- Google
- google.com
- Google Maps
- google.com/maps
- YouTube
- youtube.com
- Vimeo
- vimeo.com
- Twitter
- t.co
- twitter.com
- Instagram
- instagram.com
- TikTok
- tiktok.com
- Facebook
- facebook.com
- facebook.net
- Spotify
- spotify.com
- Podigee
- podigee.com
- Brightcove
- brightcove.net
Step 1:
Change the “src” attribute of the iframe containing the link to “data-cb-src“. Example: <iframe data-cb-src=" instead of <iframe src="
Visitors who have not consented to the display of third-party contents will first see this dialog box (using YouTube as an example) instead of the embedded contents:
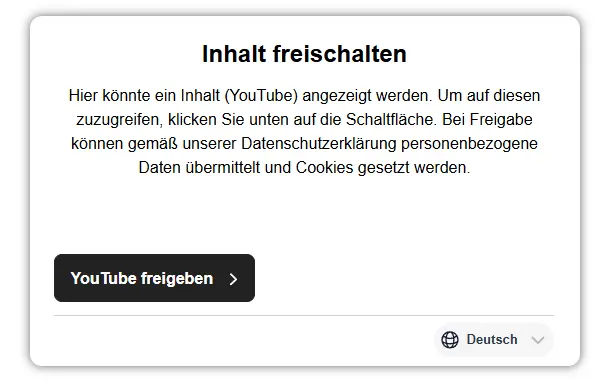
Text and design can be customized via Consent Manager → External Contents.

If the link to be embedded is a URL that is not included in the list above, you must also inform etracker of the provider (Steps 2 and 3).
Step 2:
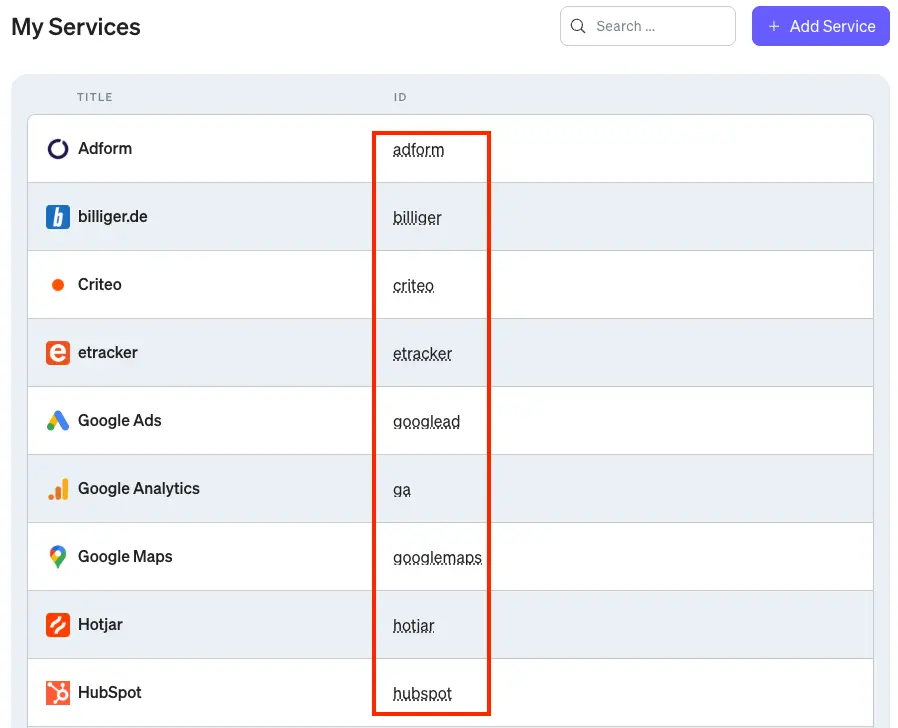
To manually assign the provider, add the attribute “data-cb-service=” to the iframe tag. You can find the service ID in Tag Manager under “Tag Manager → My Providers” in the “ID” column. If the provider isn’t listed there yet, you’ll need to add it first by clicking “+ Add Provider.”
Step 3:
Additionally, for providers not included in the list mentioned above, you can specify the name to be displayed in the overlay.
The “data-cb-placeholder=” attribute in the iframe element can be used to specify the name to be displayed both on the button and in the body text of the content overlay. Without this attribute, generic text (“this provider”) is used.
Check and activate the consent dialog
You can use the status button to activate the consent dialog with all the settings you have made.

Before doing so, it is recommended to use the preview function, which opens the website with the consent dialog in an additional browser tab.
Make sure you save any changes you make so that they are applied in live operation – and not just in the preview.
Consent protocol
When the consent dialog is activated, all consents are properly logged and can be easily downloaded in the event of inquiries from data subjects or the supervisory authorities.
